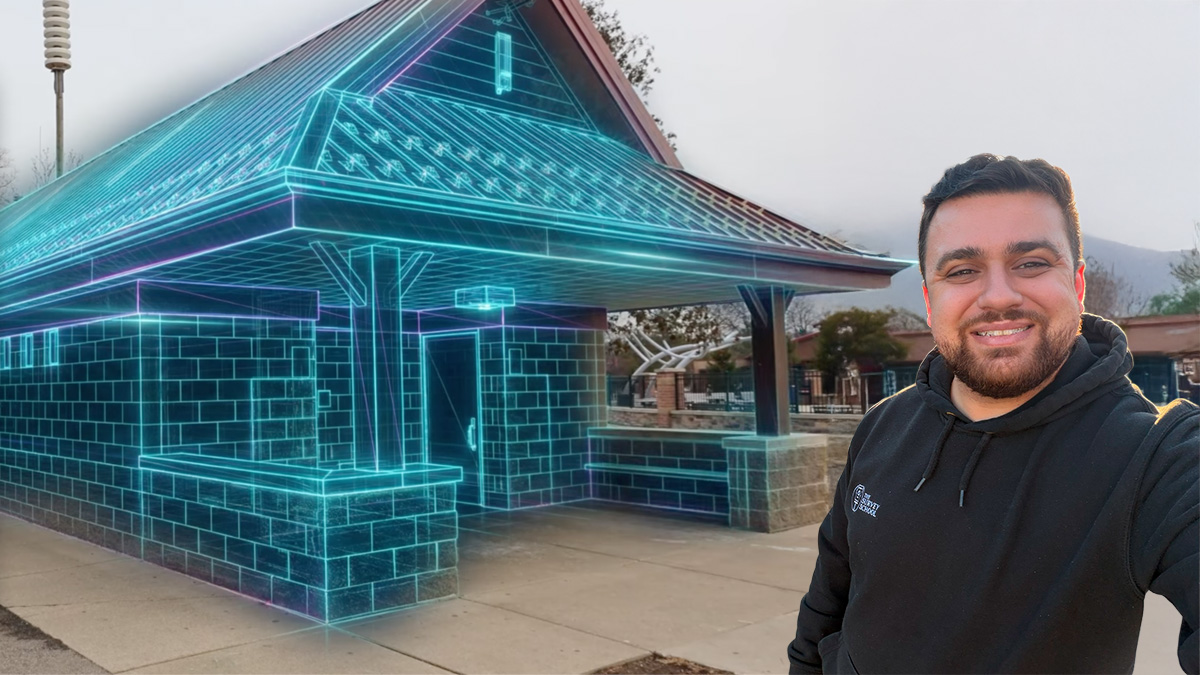
Indoor mapping in 3D using photogrammetry software
Swiss engineering and geomatic consulting firm, Mosini Caviezel SA, tested terrestrial photogrammetry for indoor mapping as a new method for establishing property plans. In this post, the team from Mosini Caviezel SA evaluated the optimal indoor mapping workflow, testing different positions and methods for data capture, and listing pros and cons for each.
At the end of the article, experts from Pix4D have further suggestions which may help others tackle an indoor mapping project.
Creating the project's workflow
This project consisted of several phases and took place in an office building of Mosini Caviezel SA, Switzerland: a rural house that includes five rooms and a large hallway.
Project information
| Company | Mosini Caviezel SA |
| Country | Switzerland |
| Industry | Surveying, Indoor Mapping |
| Project date | March 2016 |
| Project members | Christophe Croset, Michel Kasser, Sylvain Pittet, Valérie Luthi |
| Hardware | GarminVIRB™ Elite |
| Software | Pix4Dmapper photogrammetry software |
| Image number | ~100 images per project |
| GSD | <1 cm |
Evaluating the application of photogrammetry
The main objectives were to create an indoor plan in 2D, evaluate the application of terrestrial photogrammetry for establishing a PPE (Propriété Par Étages/property by floors, or condominium ownership of an apartment) plan, and find an optimal protocol for surveying and architecture companies to document property indoors that is low cost and sustainable.
Acquiring images
The first phase was to acquire images in different ways and to determine the ones which give the best results.
Using the photogrammetry software Pix4Dmapper, it was easy to assess the quality of each method and to continue to the following step – scaling the project to obtain precise measurements.
Defining an optimum workflow
In the final phase, all processed Pix4D projects were analyzed and compared in order to assess the feasibility of the workflow and to sum up for a protocol in the near future.
Testing the best way to map indoors
All images were taken with a GarminVIRB ™ Elite. The following camera settings were used:
- Fixed focal length or disabled auto-focus for stable camera interiors
- Large and fixed shutter in order to receive more light
- Low ISO values to reduce noise and improve image quality
The sports camera reduced motion-blur and the wide angle reduced the need for as many images, as it covers a wider area. This is especially important for a narrow space indoors.
After picking the preferred camera, Mosini Caviezel SA needed to know the optimal image taking plans that would give the best results. In this step, they took images from three different positions.
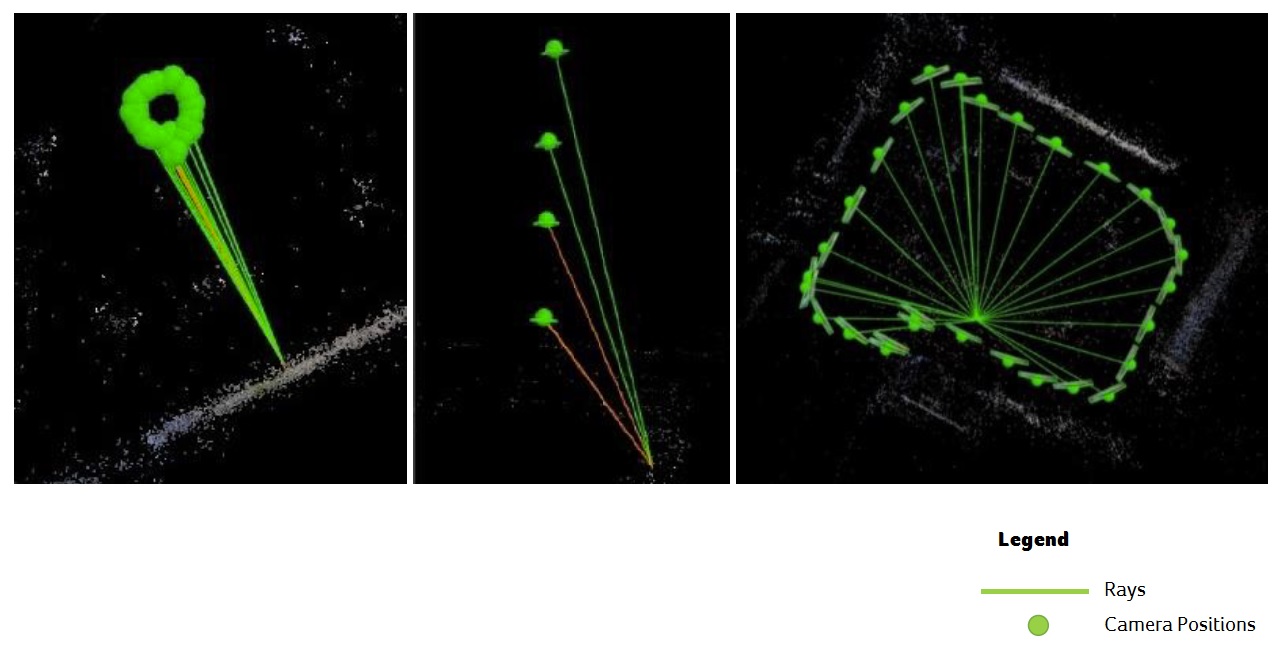
Test 1: Stand in the middle of the room and turn around while taking images
Images were taken perpendicular to the measured area. Baseline equaling to zero created sharp-angle intersections which led to unsatisfactory results. Result: unsatisfactory
Test 2: Across the room along the long side, positioned in middle of the two sides
It is generally difficult to take images crossing a narrow space, and thus this type of configuration was only applied to corridor zones. Area of interest is always at the edge of images where more distortion occurs. Result: limited use
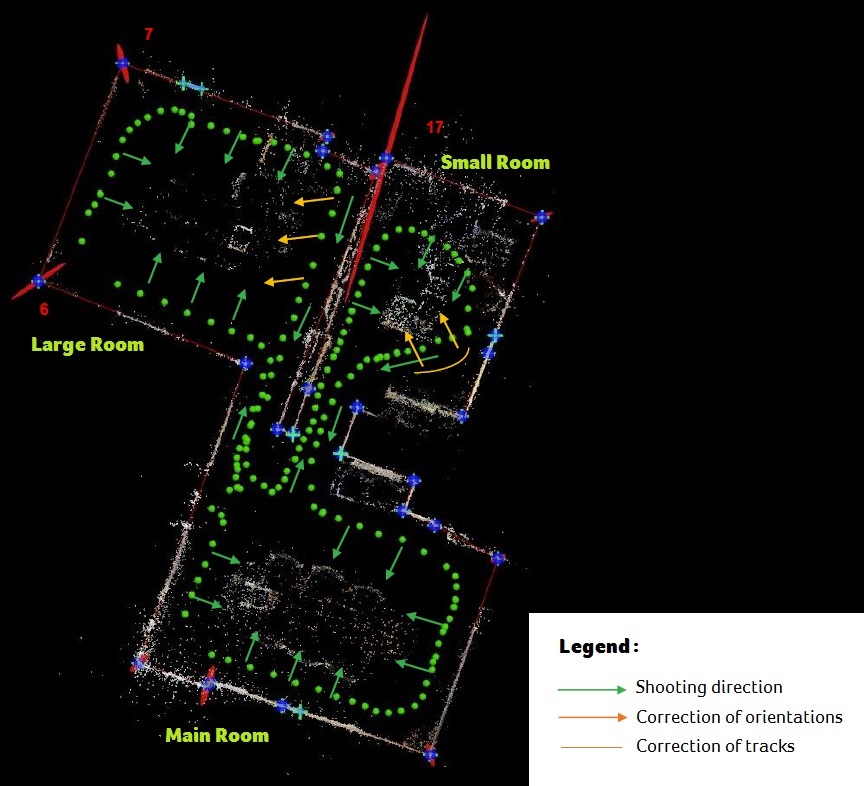
Test 3: Move parallel to the walls
In this configuration, the operator will move around the room and always face perpendicular to the area being measured. Area of interest appears at the center and thus there is less distortion in the images. Among the three walking ways tested, this one is the most favored one. Result: best option for most spaces
The best camera angle for interior mapping
After picking out the best configuration of walking around the measured space, the following step is to find the optimal camera shooting angles. Here Mosini Caviezel SA compared the actual matching results from various acquisition angles in different survey areas.
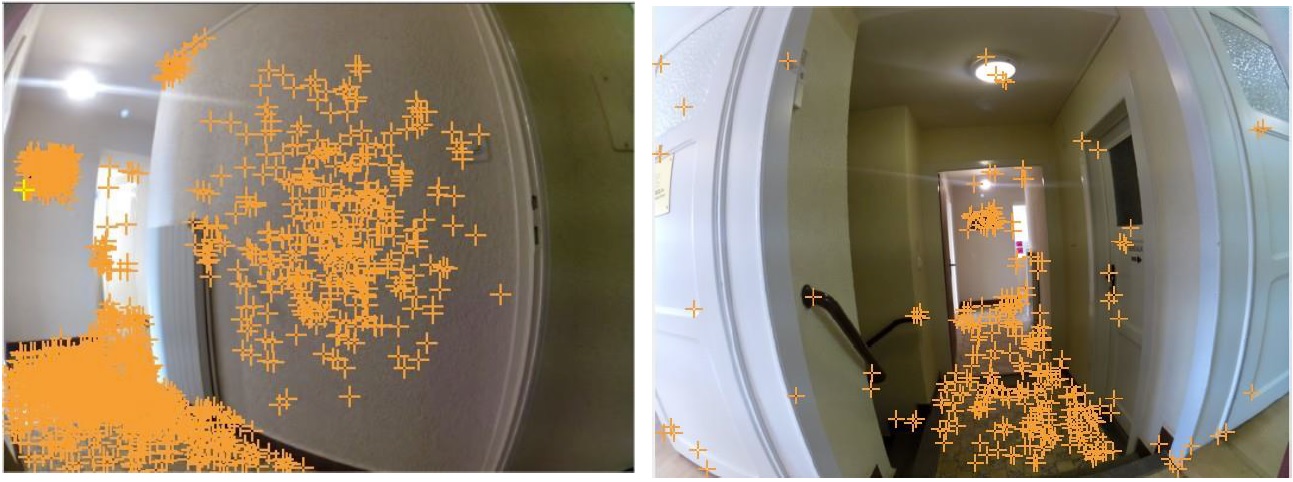
Method 1: In the middle of the room, shooting straight forward
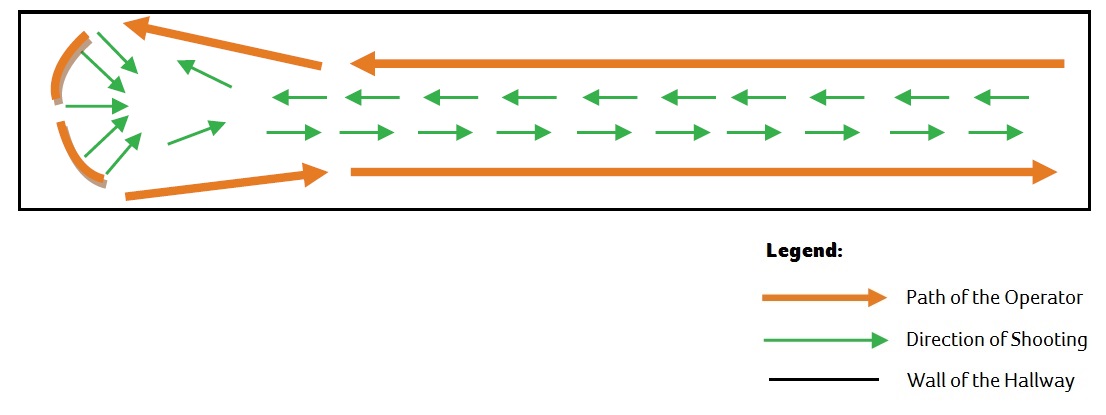

81 images acquired with this method were processed. The sharp intersection angles do not generate good matches. This reason of this unsatisfied result was similar to test 2. Pixels are obviously distorted on the edges, which leads to less matches among images than method 4, though similar projection errors (0.2655 pixels.)
| Median points of interest per image: | 21,455 |
| Median of connection points by pairs of images: | 1,756 |
Method 2: Back to the wall, shooting at 45 degrees
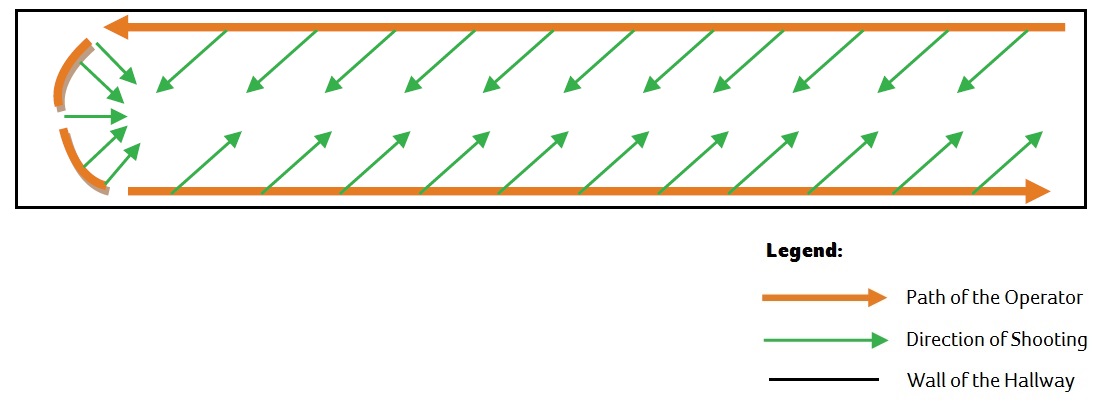
Only 58 images were needed using this method. The method forms the intersection angles slightly larger (better in this sense) than method 1 but less image overlap was obtained. No significant difference in projection errors (0.2469 pixels) was found, but fewer matches were observed. Matches were only found on the ground, and there were nearly no matches on the walls, the area of interest.
| Median points of interest per image: | 21,075 |
| Median of connection points by pairs of images: | 1,578 |
Method 3: Back to the wall, shooting at 60 degrees
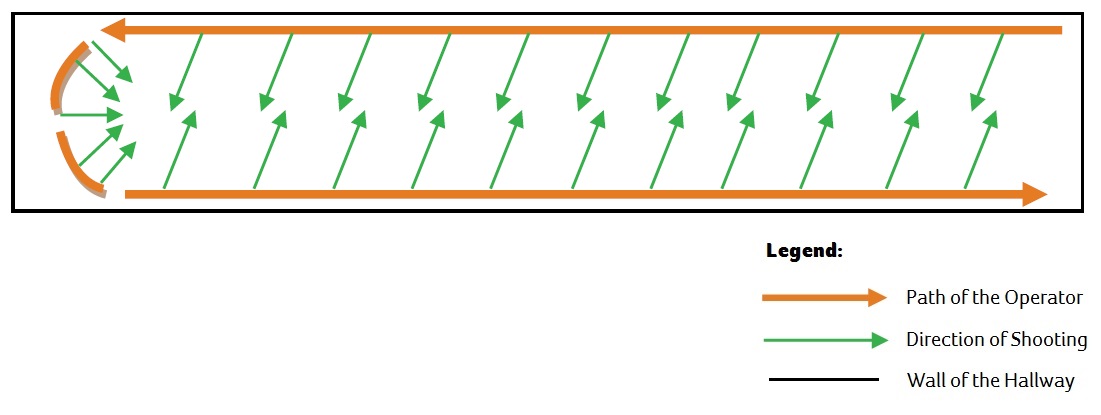
64 images were taken with this method. It produced slightly better distributed matches compared to method 2, though still concentrated more on the ground. The reprojection error is 0.2266 pixels and the number of total matches are similar to the other methods.
| Median points of interest per image: | 21,080 |
| Median of connection points by pairs of images: | 1,492 |
Method 4: Back to the wall, shooting at 90 degrees

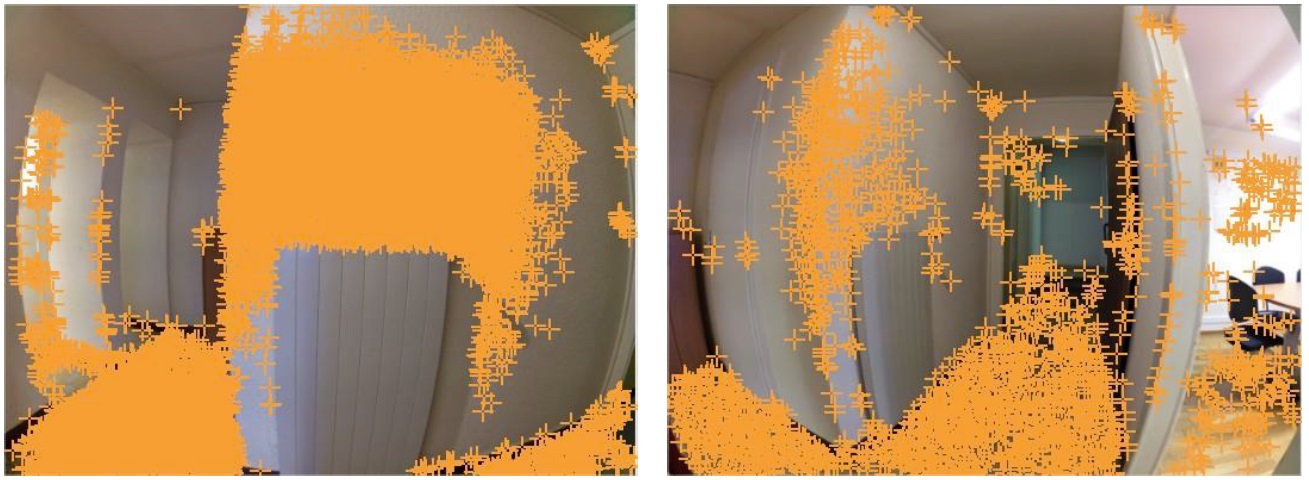
With this method, 126 images were taken and analyzed. The matches in Pix4Dmapper were the most numerous and well-distributed. Moreover, there was less reprojection error (0.2708 pixels) than all of the other methods.
| Median points of interest per image: | 21,709 |
| Median of connection points by pairs of images | 2,550 |
Result analysis
Best method: method 4, back to the wall, shooting at 90 degrees
From the above data acquisition methods, the fourth method was the most favored one, generating the best matches among images. The only disadvantage of this method is the narrower coverage and the impact from close-object obstructions. More images would be needed using the method 1 acquisition orientation.
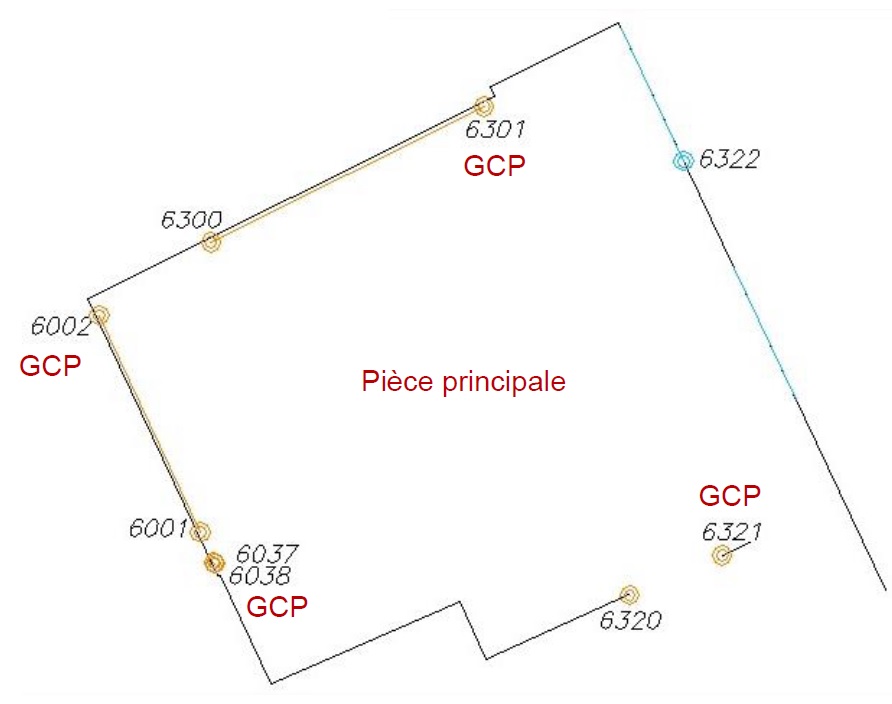
In order to obtain precise measurement of the reconstructed result, it is very important to assign correct scales under non-geolocated situations. Mosini Caviezel SA placed targets on the walls, making sure the scales were given in two perpendicular directions to ensure the scale is correct in all directions. Four control points, with local coordinates, were placed around the room, and five check points were then assessed.
Accuracy of the entire reconstruction is not as consistent as outdoor cases. However, by assigning the correct scale to the project, general measurements could get more precise.
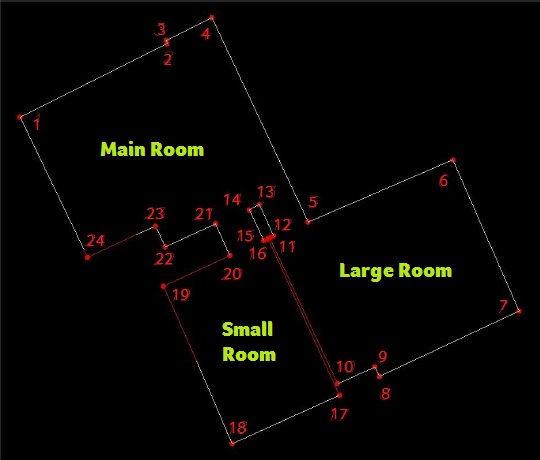
| | | | | | ---------- | ---------- | ---------- | ---------- | ---------- | ---------- | | Room | Method | Area (m2) | Difference (m2) | | Main Room | Total Station | 19.306 | | | | Photogrammetry | 19.435 | 0.129 | | Small Room | Total Station | 9.521 | | | | Photogrammetry | 9.615 | 0.094 | | Large Room | Total Station | 15.466 | | | | Photogrammetry | 15.802 | 0.336 |
Final thoughts for this indoor mapping project from Mosini Caviezel SA
Indoor mapping has been one of the challenging area for photogrammetry. However, it can be an efficient and low-cost way to obtain a precise 2D floor plan using images and Pix4Dmapper.
As traditional mapping and surveying methods are being replaced by digital approach we are motivated to trust and rely more on modern technology and digital solutions.
With the use of photogrammetric software and fully digitized actionable data, less time is spend in the field and highly representative data along with 3D visualization and interior plans are being generated.
Benefits of using Pix4mapper software for creating indoor maps in 3D
- Ideal method for reconstructing areas with complicated geometry
- Intuitive and easy-to-use interface, small learning curve
- Affordable license for new equipment investment
- Scalable platform and high-performance customer service
Suggestions for the optimal indoor map
Due to dim light conditions and narrow space, applying photogrammetry indoors is more challenging than outdoors. These suggestions may be helpful for people who would be interested in giving indoor mapping a try.
1. Use videos for continuous results
If the purpose is to obtain a 2D plan, a device with 4K video would give you more continuous results. Pix4Dmapper processes videos and extracts them into still images, and by using the video as input, you can ensure high image overlap. This is the most convenient user experience and way for acquiring a simple 2D plan, but the low resolution and large distortion will not give you a nice 3D reconstruction.
2. Fisheye cameras for easier image acquisition
Fisheye cameras or spherical cameras will make your image acquisition procedure a lot easier, but you will expect noise on the edges induced by the large distortions. You can find more information on using fisheye and perspective sensors for terrestrial 3D mapping in our whitepaper.
3. Perspective cameras for better 3D reconstruction
Perspective cameras will give you better 3D reconstruction output. However, you will need to have some experience with how to acquire images with sufficient overlap in closed area. For survey-grade accuracy, more advanced knowledge and training will be needed.
4. Spherical cameras for ultra-wide coverage
For users looking for something in between, a spherical camera is a good option. The ultra-wide coverage saves much effort of image acquisition. Looking for a well-calibrated spherical camera is important for seamless and less distorted equirectangular images.
Revolutionizing indoor mapping: Meet Pix4Dcatch
Pix4Dcatch allows users to easily create ground-based 3D models using an iOS mobile device. You don't need to be an expert, just scan the area of interest and the app will record pictures along with GPS positions. Scanning is done with real-time 3D meshing for scene completion feedback.
Images are then automatically uploaded to the Pix4Dcloud platform for a fast generation of scaled and georeferenced 3D models and points clouds that can be measured, shared and exported.
Pix4Dcatch is optimized for the newest iPad Pro and iPhone 12 Pro with LiDAR sensors. The pinpoint accuracy of LiDAR in combination with photogrammetry ensures a simpler access to critical information, more accurately than ever before.
Ready to try it for yourself?
Feel free to download our sample dataset from NCTech iSTAR to experience your first indoor mapping with Pix4Dmapper now, or go out in the field and test our newest product, Pix4Dcatch!